Today, we will share the techniques for disassembling, reassembling and repairing the oil quantity measurement unit. This will help you master the repair skills of the measurement unit.
Taking the Bosch CPN2.2 non-powered normally open measurement unit 0928400617 as an example (it is compatible with 0928400627), let's go through the process.
I.Measurement Unit Disassembly
1. The disassembly tools are as follows. These are the tools used:
Diesel Vehicle Service Club - Family of Vehicles Off the Road
Step 3
Hold the measurement valve with your left hand, and turn the tool lever clockwise;
Step 4
Remove the entire measurement valve guide rod section as shown in the figure below:

Step 5
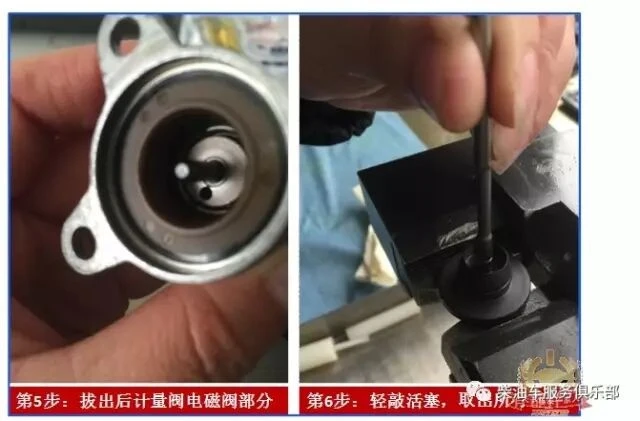
Remove the armature from the electromagnetic valve body;
Step 6
Hold the measurement valve guide rod section with a vise, and use an old CRIN1 fuel injector valve assembly valve stem as a stop pin. Hold the valve stem with your left hand and press it downward until the spring cannot be compressed any further. The piston, spring and thrust spring seat will be pushed out. As shown in the figure below:
3. The disassembled measurement unit components after the explosion diagram disassembly are shown in the following figure:

4. Common Fault Modes of the Metering Valve
1) The piston fuel passage is blocked
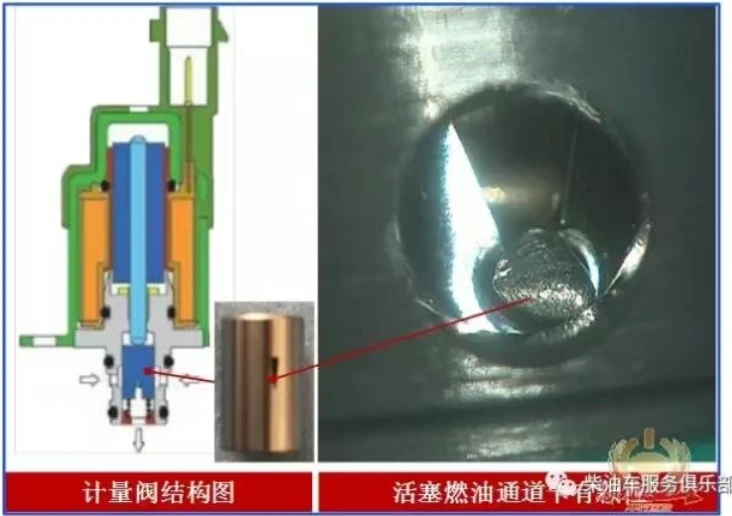
Just remove the stuck particles and the metering valve can be repaired.
2) Internal parts are rusted and stuck

The rusty piston can be polished with sandpaper of 1500 mesh or above.
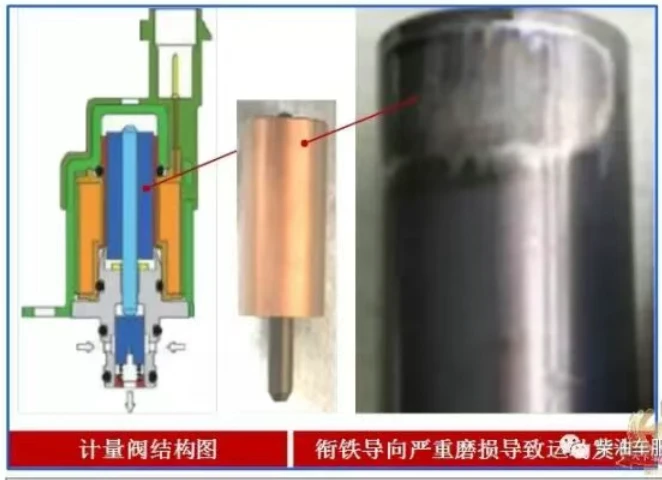
3) The armature guide is severely worn
This situation is not very common. Replace the armature if there is a problem.
4) The fuel passage of the piston becomes larger
Many experienced drivers have reported that after replacing the new metering unit, the car is not as powerful as before. Is this true? Why?
It is indeed true. The reasons we analyzed are:
Due to the excessive hard particles in the diesel, it not only causes the valve component seat of the injector to wear, but also causes the fuel passage of the piston of the metering unit to wear, thereby making the passage larger, the flow response larger, the flow rate larger, and the fuel supply capacity of the oil pump stronger, and of course more power. Drivers are accustomed to the working condition after the metering valve wears out, and after replacing the new metering valve, there will naturally be a contrast.
By disassembling the metering valve, identify which component is faulty and handle or replace it. And reassemble according to the assembly method described below.
II. Assembly of the Metering Unit
1) Pre-install the piston guide block part
Step 1: Insert the piston into the piston guide block, with the blind head with two round holes facing inward;
Step 2: Insert the spring into the piston hole, as shown in the figure below:


2) Disassembly sequence
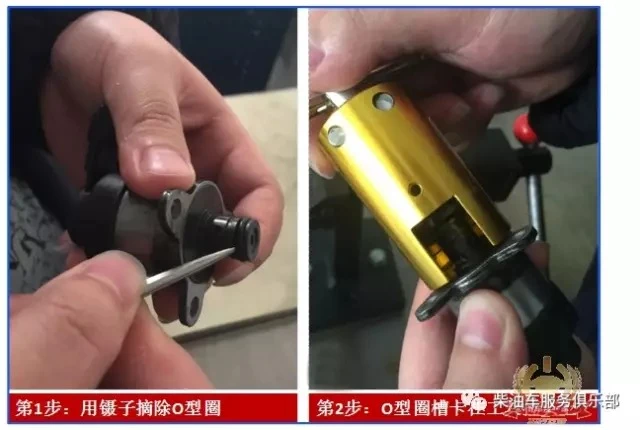
Step 1: Use tweezers to remove the O-ring on the small outer circle of the piston guide block, exposing the O-ring groove;
Step 2: Place the O-ring groove of the metering valve on the pull rod head of the tool, as shown in the figure below:
Step 3: Hold the piston guide block in a vise, and use tweezers to insert the thrust spring seat into the hole. Pay attention to the stepped surface facing inward;
Step 4: Hold the nylon push rod with your left hand, and hold the hammer with your right hand. Lightly tap the spring seat. The plane of the spring seat should be about 0.3mm lower than the outer plane, as shown in the figure:

2. Pre-installed Electromagnetic Valve Section
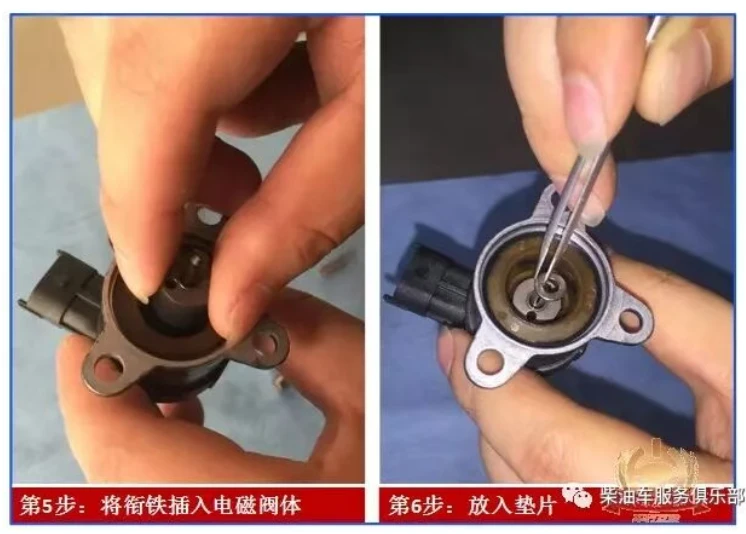
Step 5: Insert the armature into the electromagnetic valve body with the larger end facing downwards;
Step 6: Insert the washer into the smaller end of the armature as shown in the figure below:
3. Final Overall Assembly
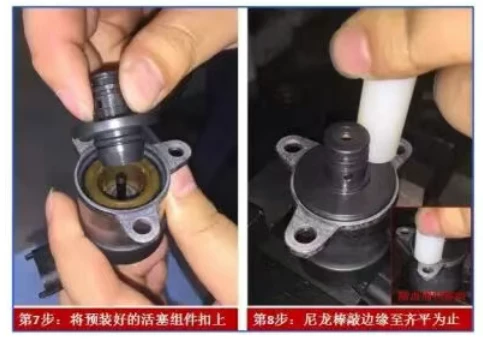
Step 7: Insert the pre-installed piston guide block into the pre-installed electromagnetic valve body:
Hold the electromagnetic valve body on a vise. Use a nylon rod to gently tap until the inner and outer edges are level. To prevent tipping, pay attention to the circular movement of the nylon rod and finally install the O-ring. As shown in the figure below: